Last spring, I was introduced to Paperless Paper piecing…….. and I love it. It does away with the endless picking out of tiny bits of paper from seams made of incredibly short stitches. It also saves a whole lot of trees, because you only need one template to make dozens of blocks.
As I have friends that aren’t sure how to do it, I did this tutorial to show how Vanecea Green showed me – the easiest method of any I’v seen so far.
So, here goes. It will probably make more sense if you have a bit of experience doing paper piecing, but give it a go.
Paperless Paper Piecing
Print your pattern on freezer paper – NOT on the shiny side. If your printer won’t take the freezer paper, you can iron a bit of fabric to the bottom of the sheet and it should feed it though ok.
1) Start by folding all of the lines on your pattern.
2) Take Fabric piece 1, and lightly iron it to the wrong (shiny) side of the pattern
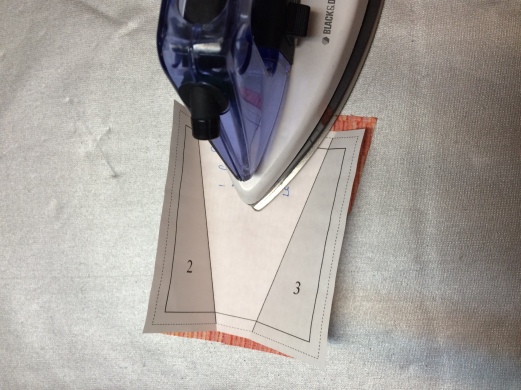
3) Put piece 2 face up under piece 1 and lined up under the stitching line. I usually trim it to ¼” but some people just trim it afterwards.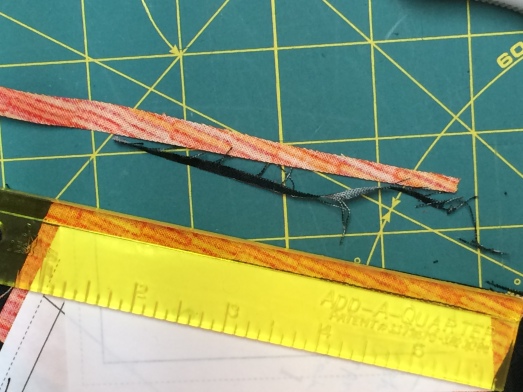
4) If you have a “stitch-in-the-ditch foot – it is the easiest to use. Not sure what they are really called – and it may be different for different machines. Here is what mine looks like.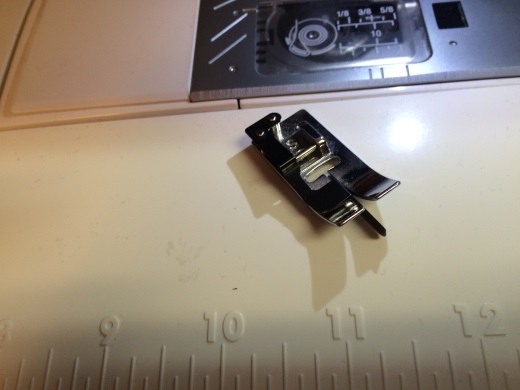
5) Line up the needle just along the side of the folded paper – this is where you would usually fold it open and sew through the paper. It works with an ordinary foot as well – you just need to be more careful not to stitch on the paper.
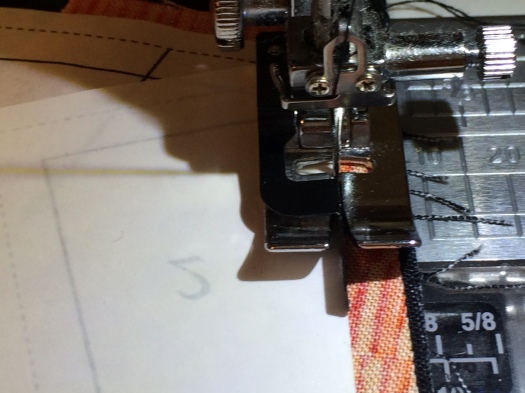
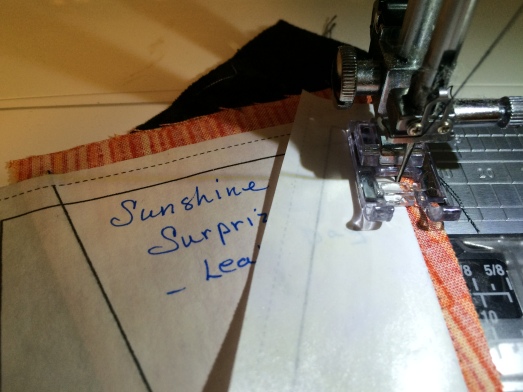
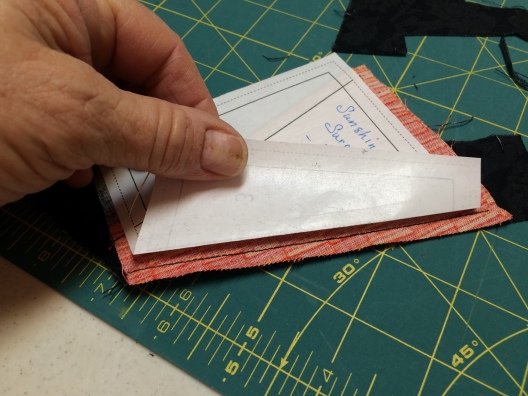
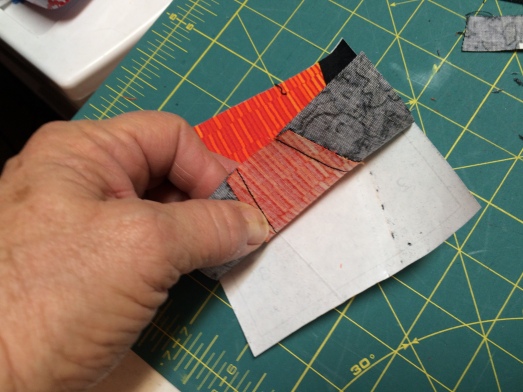
6) Trim if necessary to 1/4″. Unfold the paper and the fabric pieces, and press so piece 2 adheres to the freezer paper.
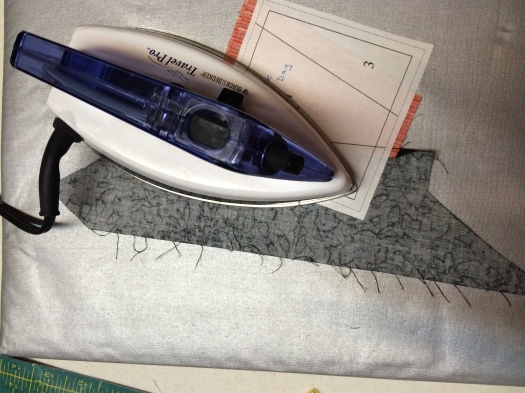
7) Then trim slightly larger than pattern piece. Fold the next seam line, and proceed with each piece in numbered order.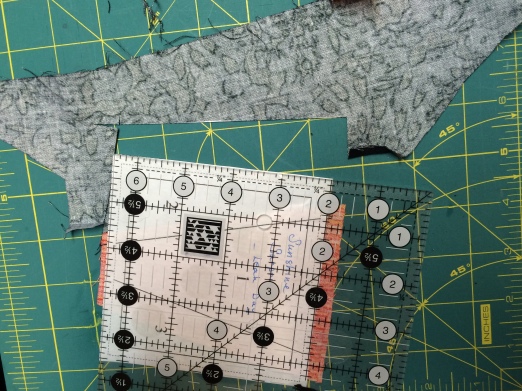
8) When you have it all together, trim and carefully take the freezer paper off. I find it better if you pull toward the seams away from the sewn part towards the raw edges, as it can fray a bit if you pull against the raw edges.
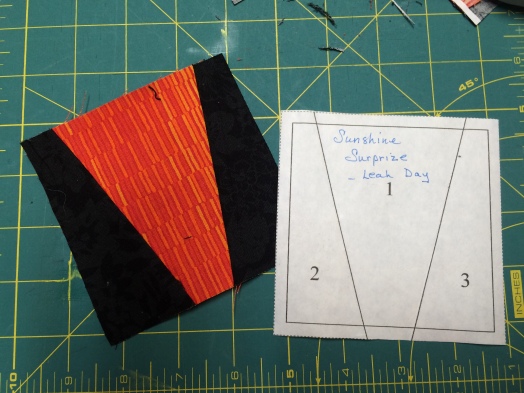
9) And here you are, with your freezer paper pattern all ready to make more blocks.
I hope you have fun with this. It may be a bit confusing at first, but after a bit, you won’t ever want to do it any other way.
Enjoy!
5) Line up the needle just along the side of the folded paper – this is where you would usually fold it open and sew through the paper. It works with an ordinary foot as well – you just need to be more careful not to stitch on the paper.
6) Open the paper and the fabric pieces, and press so piece 2 adheres to the freezer paper.
7) Then trim that piece, fold the next seam line, and go ahead as normal.
When you have it all together, trim and carefully take the freezer paper off. I find it better if you pull toward the seams away from the sewn part towards the raw edges, as it can fray a bit if you pull against the raw edges.
Paperless Paper Piecing
Print your pattern on freezer paper – NOT on the shiny side. If your printer won’t take the freezer paper, you can iron a bit of fabric to the bottom of the sheet and it should feed it though ok.
1) Start by folding all of the lines on your pattern.
2) Take Fabric piece 1, and lightly iron it to the wrong (shiny) side of the pattern
3) Put piece 2 face up under piece 1 and lined up under the stitching line. I usually trim it to ¼” but some people just trim it afterwards.
4) If you have a “stitch-in-the-ditch foot – it is the easiest to use. Not sure what they are really called – and it may be different for different machines.
Here is what mine looks like-
5) Line up the needle just along the side of the folded paper – this is where you would usually fold it open and sew through the paper. It works with an ordinary foot as well – you just need to be more careful not to stitch on the paper.
5) Line up the needle just along the side of the folded paper – this is where you would usually fold it open and sew through the paper. It works with an ordinary foot as well – you just need to be more careful not to stitch on the paper.
6) Open the paper and the fabric pieces, and press so piece 2 adheres to the freezer paper.
7) Then trim that piece, fold the next seam line, and go ahead as normal.
When you have it all together, trim and carefully take the freezer paper off. I find it better if you pull toward the seams away from the sewn part towards the raw edges, as it can fray a bit if you pull against the raw edges.

Dear Kathi, Thanks oh so much for your great tutorial, it looks like something useful to know and I will try it as soon as I can get my sewing machine out.It is cooling fast here now and we have night by 8 or 9 degrees, but still some sun during the day. this coming week I hope to go mushroom hunting.What is new with you ? Wishing you a great sunday and lots of good times.Thanks again, love, Corinne
From: wanderingquilter To: corinnelouise@yahoo.com Sent: Saturday, October 1, 2016 8:03 PM Subject: [New post] Paperless Paper Piecing #yiv8653744163 a:hover {color:red;}#yiv8653744163 a {text-decoration:none;color:#0088cc;}#yiv8653744163 a.yiv8653744163primaryactionlink:link, #yiv8653744163 a.yiv8653744163primaryactionlink:visited {background-color:#2585B2;color:#fff;}#yiv8653744163 a.yiv8653744163primaryactionlink:hover, #yiv8653744163 a.yiv8653744163primaryactionlink:active {background-color:#11729E;color:#fff;}#yiv8653744163 WordPress.com | kuwaitquilter posted: “Last spring, I was introduced to Paperless Paper piecing…….. and I love it. It does away with the endless picking out of tiny bits of paper from seams made of incredibly short stitches. It also saves a whole lot of trees, because you only need one te” | |
Kathi, what an awesome post. I am going to try This!!! Nothing I hate more than trying to remove that paper backing.
I love it… it made me love paper piecing, because I, too, hated taking all that paper out at the end, and using so much paper as well.